How to Use a Multimeter to Diagnose a Faulty Appliance
September 12, 2016 | DIY & Home Improvement | No comments
What’s the first thing you do when your oven’s stopped heating or your fridge has stopped cooling? Well, duh. You turn to your most trusted advisor for advice – the internet search engine. Instantly, you find a wealth of useful information at your fingertips. There’s just one problem. In all of the articles, videos and diagrams, time and time again, the advice is to diagnose your appliance with a multimeter.
Only problem is, you don’t have a multimeter. Even if you did, you don’t know how to use one.
If the scenario above strikes a chord then rest assured you’re in exactly the right place. We’re going to tell you everything you need to know about diagnosing faulty appliances with multimeters, all without boring the pants off you. Think it can’t be done? Challenge accepted.


What is a multimeter?
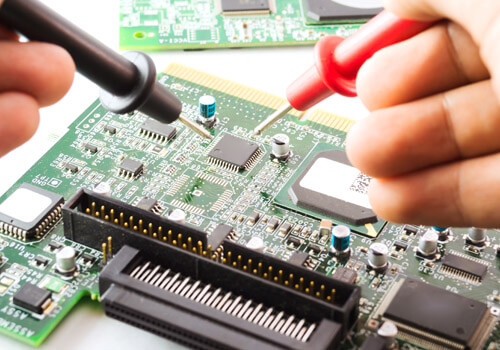
See that orange box with the wires at the top of the page? That’s a multimeter.
Also known as electronic meters, digital meters and test meters, multimeters are designed to test and diagnose electronics and electrical components. Multimeters have a multitude of uses – the clue is in the name!
You can use yours to check:
- Household batteries
- Light bulbs
- Car batteries
- Fuses

Resistance is silent and invisible, but all around you. You’ll find resistance in every home and every workplace. Just to clarify, we’re not talking about civil uprisings or overthrowing dictatorships, but something much more mundane: the resistance you find in every working electrical circuit. The resistance readings of your electrical parts will give you a very good idea of whether or not they’re faulty.
How can you check the resistance in your appliance parts? Enter the multimeter!
How Multimeters Measure Resistance
Multimeters send a small amount of power through the part you are testing and by measuring the current, calculate the resistance. It’s as simple as that.
Now buckle in, multimeter aficionados, now you know what a multimeter is you’re ready to learn how to use it.
First Things First…
If you don’t already have one you’ll need to get yourself a multimeter. High quality models will give you a more accurate reading and potentially be more durable, so as with most DIY equipment it’s always best to go for high quality if you can.
Now, multimeter at the ready? Faulty appliance at the ready? Here we go!
Measuring Resistance in Seven Easy Steps
- Turn off and unplug your appliance. Safety first!
- Remove the potentially faulty part from your appliance. (Or simply remove the wires connected to the part to isolate it.)
- Turn on your multimeter and set to the lowest resistance setting. The resistance settings are the ones measured in Ohms. Ω Look for this symbol on your meter.
- Test your multimeter is working by pressing the probes together. The multimeter screen should read 0.00 also known as short circuit (inexpensive meters may read close to this from resistance of their leads). When the probes part the screen should read 1 or OL, also known as open circuit.
- Find the two connections where wires connect to your part.
- Push the metal parts of your multimeter probes firmly onto these connections, one probe on each connection. (It doesn’t matter which way round the red and black probes connect here.)
- Keep the probes still until you get a reading on the multimeter screen. Take note of the reading.
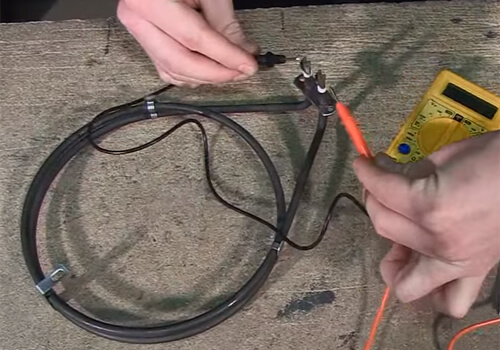
Here’s Mat demonstrating how to test small appliances for faults with a multimeter.
How Do I Know My Multimeter Dial Is On The Right Setting?
This is a very good question. The answer you’ll be pleased to hear is quite straightforward. You’ll see one of two things if your multimeter dial is on the wrong resistance setting.
1 or OL
If the display reads 1 or OL the setting is too low. Turn the multimeter dial to the next highest resistance setting. Continue increasing the setting until you have a reading that’s a full number.
Less than 1
If the number on the screen is less than 1 (0.67, 0.25 etc.) the setting is too high. Turn the multimeter dial to the next lowest setting to get a more accurate reading. Continue decreasing the setting until you have a reading that’s a full number.
Still confused and wondering who thought it’d be a good plan to create so many different settings? There’s method to the madness! You wouldn’t use a 15cm ruler to measure how many miles your car has travelled. Likewise when you’re measuring potential readings of both tens of Ohms and tens of millions it makes sense to have different ranges to measure them.
When you’re diagnosing your home appliances you’ll most likely only need the two lowest resistance settings anyway. But if you’re still not certain which setting to use you’ll be pleased to hear you can get an auto-ranging multimeter which does the hard work for you and doesn’t require any dial adjustments.

4 Ways to Recognise a Fault (Yes 4!)
- Infinity Resistance If the display shows 1 or OL no matter the resistance setting you’ve most likely got a faulty part on your hands.
- Really High Resistance In the millions when you were expecting a reading in the hundreds.
- Really Low Resistance Tiny numbers on the lowest resistance setting. Really low resistance readings imply a short circuit in your part.
- Resistance Between Your Part and the Surrounding Metal This can be the cause of your appliance tripping a fuse in your fuse board. However, in washing machines and tumble dryers you may sometimes measure a very high amount of resistance here, but this is most likely a deliberate safety measure to let residual power travel into the earth when the machine is switched off.
The Irresistible Table of Resistance
The following table shows the rough readings to look for from various parts, but do not worry, repeat DO NOT WORRY about exact numbers. Lots of factors affect resistance so if you’re getting a resistance reading somewhat in the ball park you were expecting your part is unlikely to be faulty.
| Component | Average Resistance |
| Heaters | 20 – 40 Ω |
| Large motors | 3 – 20 Ω |
| Small motors and pumps | 50 – 200 Ω |
| Water valves | 2000 – 4000 Ω |
| Switches, thermostats & fuses* | 0 or nearly 0 Ω |
*Parts like these that pass power on rather than using it (i.e. parts that don’t generate heat, light or movement) should have a low resistance.
There, that wasn’t so bad, was it? Pants still on? If after all this information you’re still thirsty to know more about multimeters, (you’re a person after our own heart) then check out our playlist of multimeter videos for demonstrations of multimeters in action and guides on diagnosing specific components. Happy diagnosing!
Tags: multimeter